It's as Easy as Strawberry Rhubarb Pie

Strawberry Rhubarb Pie. Three words I never would have put together on my own. You see, I don't love cooked strawberries, except in a jam-like state. And, rhubarb and I have previously been unacquainted. Pie is not something I make as a regular event.

My friend had a birthday and she loves fruit pies. So I thought I'd try my hand at making one for her. My CSA box contained both strawberries and rhubarb this particular week. I took a chance, asked a few friends some questions and concocted this lovely pie.

To be honest, I only had a small bit of it (I used regular flour pie crust instead of gluten-free) and I was wary of all that cooked fruit goodness in one place. I was pleasantly surprised by the resulting pie: not too juicy, nor overly sweet with a nice crunch from the rhubarb. I did read later on that there should be no crunch from the rhubarb but my friend said she preferred it this way (maybe only to be nice?!).

I think I also understand the saying "It's as simple as pie" now. I diced a few things, measured out some sugar, vanilla and lemon juice and plopped it all in a pie crust (yes, I used pre-made, we've already discussed that I am not much in the way of pastry doughs). Ina bout an hour, I had a pie that was cooling on a rack awaiting some frozen treat to be served alongside of it.

Pies are going to be featured a little bit more in my summer cooking. It's still quite warm here in San Francisco (which is not the weather we normally have in June) which is inspiring me to experiment with some more pie combinations soon. I'm thinking a plum variety, maybe with some apricot thrown in there, with a gluten-free piecrust so I can fully enjoy myself.

Strawberry Rhubarb Pie

Ingredients:

  • 3 stalks rhubarb, cleaned and diced
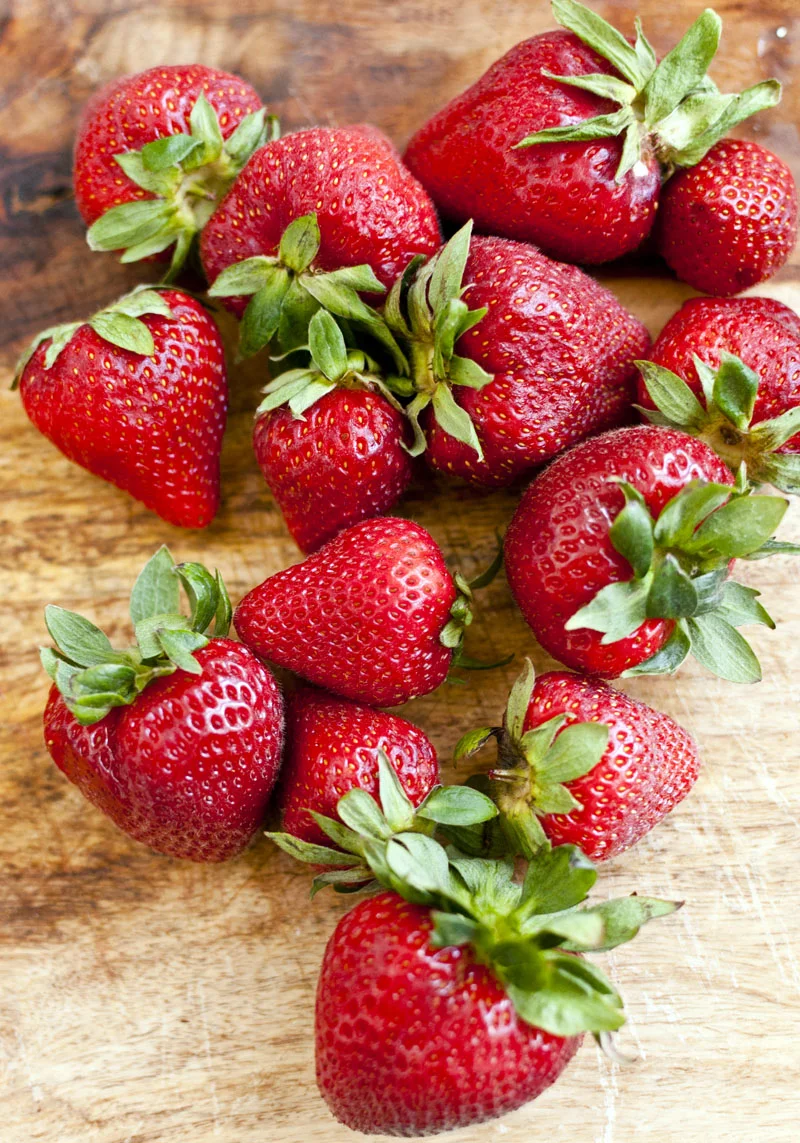
  • 1.5 pounds strawberries, cleaned, hulled and cut into chunks
  • 1/2 cup sugar
  • juice of 1 lemon
  • 2 tbsps real vanilla extract
  • 2 prepared pie crusts (gluten-free pastry dough mix can be found here)

Method:

  1. Preheat oven to 425 degrees F.
  2. In a large bowl place the rhubarb, strawberries, sugar, lemon juice and vanilla.
  3. Using a large spoon (or I use my hands) thoroughly coat the rhubarb and strawberries in the sugar and liquids.
  4. Let sit for ten minutes, to get the juice flowing out of the fruit.
  5. While the mixture rests, take one of your pie crusts, flatten it out and cut it into strips to form the lattice for the top of the pie.
  6. After ten minutes has passed, put the fruit mixture into the remaining piecrust, making sure all of the juice get into the pie as well.
  7. Cover with strips of piecrust, making a criss-cross (or whatever pattern you like if you have a favorite style, as long as there are air holes of the steam to escape while baking).
  8. Crimp the edge of the top lattice to the bottom edge of the piecrust.
  9. Place the pie pan on a baking dish or put some aluminum foil underneath the pan to catch any drips.
  10. Bake in the oven for 15 minutes at 425 degrees F.
  11. Turn the oven down to 375 degrees F and bake for another 40 to 45 minutes.
  12. If the crust is browning too quickly, tent the pie with foil.
  13. Once the pie is out of the oven, rest it on a cooling rack for an hour (or if you want it to be warm, 40 minutes) before cutting and serving.
  14. Serve alongside ice cream or sorbet.


Delightful! Roasted Summer Squash with Roasted Garlic and Fennel

 Wow. That's all I can say. This summer squash with roasted garlic and fennel salad blew me away.

(yes, I know I came up with it and that's not a really modest thing to say, but I'm just being honest).

The taste of fennel brings me directly back to Gran Fran and Joe's house. We eat fennel raw, like it's celery. I didn't realize this was not the way normal people ate fennel. I was surprised to find it cooked in a dish at a restaurant and everyone at the table looked at me like I was crazy.

When we were kids, I remember once we told one of the neighbor kids that it was gum, but I have no idea why we decided to trick this kid. I happened to have some fennel in my mouth that I'd been chewing for a long time, so it had become a kind of a paste. I guess the kid believed us, not sure, I remember just following along what one of my older sisters told me to do and ended up chewing that fennel for a very long time.

But I digress. The short story here is that I came up with a perfect combination in this recipe (no modesty again). The crunch and anise of the fennel against the soft sweetness of the roasted squash is just right. By adding in some mellow roasted garlic and a bit of vinegar, the dish comes together perfectly. If you eat cheese (which I can't), make sure to have some nice grated Parmigiano Reggiano on hand to sprinkle over top.

 as featured on The Fruit Guys website

Roasted Summer Squash with Fennel and Roasted Garlic

INGREDIENTS

  • 1 cup summer squash of your choice, cut into chunks
  • 3/4 cup olive oil
  • 1/8 cup red vinegar
  • 1 bulb fennel shaved
  • 4 cloves roasted garlic (recipe here)
  • Salt and pepper to taste

PREPARATION

  1. Preheat oven to 425 degrees and place an empty jelly roll pan in to heat up at the same time.
  2. Once the oven has preheated, carefully remove the tray from the oven, pour 1/4 cup of the olive oil onto the tray and place the summer squash on top.
  3. Turn the squash chunks over several times to coat in the oil and sprinkle with salt and pepper.
  4. Cook for 15 to 20 minutes, until the pieces have browned and softened.
  5. In a large salad bowl, mix the roasted summer squash with the shaved fennel, roasted garlic and the remaining oil and vinegar.

Serves 4. Prep time, 5 minutes; cook time, 20 minutes.

Cook’s note: Serve alongside a frittata or a pizza.

Best Spread Ever: Oven Roasted Garlic

I believe the title says it all: oven roasted garlic is truly the best spread ever. In just a few simple steps, you can make yourself a soft, caramelized, not-quite-so-pungent spreadable garlic.

Way back in my retail days (well, I'm still in retail, but I'm referring to being on the sales floor) there was a run on terra-cotta garlic roasters. They look like little domes with a small dish whose lip comes up and around the bottom of the dome. You put a whole head of garlic in the dish, with the tops and ends trimmed off, added some salt and olive oil, covered it with the dome and put it in the oven. In about an hour, you had yourself some nicely roasted garlic cloves.

Coming from a family where Gran Fran was pretty much against any kitchen gadget except for her Kitchen-Aid mixer, this little device was a hard sell for me. It was the early '90's when cooking was just becoming a spectator sport. The Food Network was still showing old Julia Child episodes, no superstar chefs were jamming the airwaves yet.

When a box of garlic roasters landed in front of me to be unpacked and shelved, I heard Gran Fran in my head with the following words of wisdom:

"What's the point of this? Why can't you just take a bit of aluminum foil, make a pouch out of it and roast the garlic in there? It's good enough for me...And, you never know with the terra-cotta how to get them as clean as possible. They hold germs, you know? Salmonella, botulism, who knows what else? I'll stick with my foil, thank you very much."

I had to agree. And continue to agree. Over the years I've had some bad roasted garlic (not enough oil to keep the cloves moist) and some stellar ones (see the pictures above and below). Foil is your friend, as well as a hot oven. Actually, you could do low and slow roasting for a very long time, but I just don't have that kind of time to be in the house with the oven on, so I choose to do mine on a higher temperature, always keeping an eye and a nostril out for burning.

Enjoy this roasted garlic on pasta, with roasted veggies, as a base on your pizza crust before you put the sauce on, or as I did, on toast with anchovies on top. And make sure to use the olive oil you cooked the garlic in, it's very flavorful.

If you love garlic and live our here in the Bay Area of California, you can stop by the Gilroy Garlic Festival in late July.

Roasted Garlic

Ingredients

  • 1 large head fresh garlic, top and ends cut off
  • 4 tablespoons olive oil
  • 2 teaspoons ground kosher salt

Method:

  1. Preheat oven to 425 degrees F.
  2. Take a large piece of aluminum foil and place the garlic in the center.
  3. Pick up the foil, placing the bulb in your hand so that the foil creates a pouch.
  4. Add the oil and salt and seal the packet at the top by twisting the foil over itself.
  5. Roast in the oven for 40 minutes.
  6. Be careful opening up the pouch, there will be some steam.Remove the now softened garlic from the aluminum foil.
  7. Once it has cooled enough to work with, push the garlic out of its skin.
  8. The roasted garlic can be stored in an airtight container in the fridge for 1 week.

Father's Day Special: Slowcooker BBQ Pulled Pork

Today is a day to go out and have fun with your dad. Whether you're playing golf, running races or taking a boat ride, you can make a wonderful meal for your dad with little to no effort.

Pull together these 4 ingredients, throw three of them into the slow cooker and head on out to your fun day with dad. When you get home from all your fun, a nice BBQ pulled pork awaits you. Served on bread, rolls or even over pasta, this pulled pork is the base for many satisfying meals.

So go ahead, celebrate dad and make his day with a BBQ pulled pork meal!

Happy father's day to all you dads out there!

Slow Cooker BBQ Pulled Pork

Originally published on the Kraft website.

Ingredients:

  • 1 boneless pork shoulder (3 lbs.)
  • 3 onions, sliced, separated into rings
  • 18 ounces Barbecue Sauce (I used Stubb's Sweet sauce)
  • 8 Udi's Gluten Free Rolls

Method:

  1. Place meat in slow cooker; top with onions and barbecue sauce.
  2. Cover with lid. Cook on LOW 8 to 10 hours (or on HIGH 4 to 5 hours).
  3. Remove meat from slow cooker
  4. Cut off excess fat  and fry it in a pan over high heat to serve as a crispy topping for the pork.
  5. Chop meat into small pieces or shred with fork. Return to slow cooker and stir to coat with sauce.
  6. Fill rolls with meat mixture and serve.